Redmoon
Member
My only request that you only share the link to this tutorial on other forums. ***I'd like to get a little credit for this, and would also like ServUO to get credit for being such a friendly/helpful forum *** 
Step 1-Organization
**I have already covered how to edit & extract bmp files from a flc or gif**
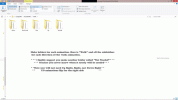
You should have each animation type extracted into a folder named for it's type.
(Ex: the animation for walk,run,death,etc should be in a folder named “walk” , “run”, “death”, etc)
You will now need to add sub-folders inside each animation type folder for each direction
Ex: Inside folder “walk” you should add folders named:
“Down”
“Down Left”
“Left”
“Up Left”
“Up”
***optional but advisable***
“Not Needed”
Now you should have a main folder “walk”, with 5 sub-folders, and all the walk.bmps
Ex: “C:\Royal Griffin\Walk\Down”
You will now select all the bmps for each direction and place them into it's respective sub-folder.
Ex:all walking animations facing down should be placed into the “Down” folder.
"C:\Royal Griffin\Walk\Down\down_53.bmp”
This should be done for all other directions, place all the right facing bmps into the “Not Needed” folder if you have made this folder. You can now select the first bmp in each sub-folder, press ctrl+a to select all, press f2 to rename all bmps to it's animation type, direction and sequence number
walk32.bmp-> walkdown_1.bmp. (windows will auto number the files for you)
Step 2- Low or High Creatures
You will now need to decide if you want your animation to be a low level creature or a high level creature
The two big differences in low and high are:
1. Run is only available to low creatures
***This is needed for mounts***
2. High has more frames per slot and more slot types
3. Animation types Eat / Stomp
*****Please refer to the rar for the breakdown*****
Step 3- Selecting your frames
**I will be using a high level creature for this tutorial; it can be used with the low level creatures too**
You may have more walk.bmps than we will be able to use, and will now have the tricky part of selecting what frames you will want to keep.
Since I am using a high level creature, I can only have 10 frames for any walk bmp (walkdown, walkDL,etc)
This part is completely up to you on what you want your animation to look like, but you can only select 10 frames per direction:
walkdown=10, walkDL=10, walkleft=10, etc
***Right side has more frames than the left!?!?***
If you run into this problem, and you made the optional folder “Not Needed”, then you can simply use a program like photoshop, corel photopaint, etc. to flip the bmp image horizontally. Use these flipped images in place of the original left facing bmps. Now you should have the same amount in each sub-folder.
***I don't have an animation named “x”***
I didn't have an animation for “BlockRight”, I simply looked at the red dragon's animation for this and used a similar animation set up.
Ex: I used animation “ForifyWalk”, but it was just walking. So I looked for the number of frames I could use and made mine with selected bmps, and renamed them to reverse the order of the numbers.
**You can mis-match frames from any animation type or direction to get the final results you are looking for!**
****Helpful Tips****
Make a backup copy of your starting animations (flc, gifs, or bmps)...and DO NOT TOUCH THEM!!
Do NOT empty your recycle bin until you are 100% positive that, that animation is complete!
You can “test” your animation sequence with the bmps (no need to re-make a flc/gif)
To do this:
Make sure you can see a preview of the image inside the folder (Should be on the right side of the window)
You should have renamed your frames so they will all have the same names and numbers for sequence;
click the first frame and scroll through the rest with the right arrow button ~slowly~ .
Short cut keys are helpful when dealing with many files
here is a quick list:
ctrl+a (select all)
ctrl+c (copy)
ctrl+x (cut)
ctrl+v (paste)
ctrl+z (undo)
ctrl+s (save)
f2 (rename)
**photoshop only**
f1 or whichever short cut you choose for quickly flipping image
Step 4- Calculations
***Tools Needed for next steps***
-mulpatcher
-UO Animation Calculator
-UOAnim
-michelangelo
-UOfiddler
Mulpatcher.exe:
Open mulpatcher.exe and load your anim.mul and anim.idx files
***A docker window will pop up and tell you that anything you do in the anim files will be done “on the fly”***
Scroll all the way to the left and select the “Anim” tab
Select “Empty Slots”
Select an empty slot for your animation:
H=high level
L= low level
P=People & Wearables
Make a note on the number you have selected and close mulpatcher.exe.
***I am going to use slot H:0x4F (79) for this tutorial ***
UO Animation Calculator:
Open UO Animation Calculator and type in the number (decimal value) for the slot you selected and hit enter. Make a note of the number for “First Animation Frame”
***slot # 79 has first animation frame number: 8690***
Close UO Animation Calculator
UOFiddler or breakdown.rar:
I suggest pre-making folders for each animation type with the # and name of animation type. You can look in UOFiddler or the breakdown.odt for examples of animations that are used.
Ex: 0-Walk, 1-Idle,etc
Step 5- .bmp to .uop
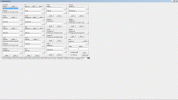
UOAnim:
Open UOAnim and click the “Add Animation” button, and type in the number from UO Animation Calculator's “First Animation Frame” in the “Block Number” and click OK.
** This will start the first set of animations in the sequence “walk” **
***The sequence for UO is always Down, Down Left, Left, Up Left, Up***
****UO uses a flip technique for the right side of animations,
so right is not needed****
Next, click the “Add Image” button and load the first bmp for “WalkDown”
Continue adding all the bmps for Down via the “Add Image” button
** WARNING: If you mess up you will have to start over, so be meticulous! **
**This is the reason for all the “Organization” earlier**
Once you have added all the frames for WalkDown.bmp, we can move on to WalkDL (down left)
We will repeat what we did above with “Add Animation”, but this time we will change the “Block Number” to +1
Ex: 8691 (8690 +1)
Repeat these steps until you have all (5) animation directions done, then click “Create Patch”
and save as “0-walk”. This will make a 0-walk.uop.
**Take note of the last number of the 0-walk animation block number**
Close and re-open UOAnim
Repeat above steps for the next animation set, but increase the block number by +1
Ex: 8694 was my last block number for 0-walk, so my first block number for 1-Idle will be 8695
***Repeat all of the above steps in UOAnim for all the animation types & directions***
You should now have 1 .uop file for each animation type (walk, idle, etc, etc) saved
Step 6- .uop to .vd
Michelangelo:
Open michelangelo and click “Import”
Import the first animation uop (0-walk.uop)
continue importing all the uop files until all are within michelangelo
**Note that you will need to import each animation uop in order from 0 to last #**
*************************Suggestion, but not nessesary*****************************
I like to save my completed uop file, so at this point I would suggest clicking “save” and saving your total animation.. “AnimationName.uop”
Ex:RoyalGriffin.uop
*********************************************************************************************
Now, export this into a verdata.mul
** You can make a new verdata.mul by making a new text document and re-naming it “verdata.mul” make sure to delete the .txt extension. **
Close michelangelo
Mulpatcher:
Open mulpatcher and load your anim.mul, anim.idx, and your new verdata.mul.
Scroll all the way to the left and select the “Anim” tab, then select full slots.
**You can search for the slot # you used for your animation, it will be fairly easy to find as it's color is green.**
Once you find your animation, click to select it, then right click and “Save to File”.
**You can name this anything you want, or leave the slot number for the name**
Close mulpatcher
Step 7- .vd to .mul
Mulpatcher:
Open mulpatcher and load:
anim.mul
anim.idx
tiledata.mul
art.mul
art.idx
**Optional**
**one of the other anim#.muls**
Go to “Anim” tab and go to your animation slot number
Single click it to select, then right click and “Load from File”
Located YourAnimationName.vd or slot#.vd and load it.
Step 8- **Only for mounts**
**This step only works with clients up to 7.0.8.2 at this time**
Go to the TileDataS tab and click “Fill Slots to 0x7FFF”
Find an empty slot, and set:
Name: Your Animation's Name Mount
AnimID: Your Animation's animation #
Weight: 1
Height: 1
Quality: 25
check:
Wearable, and Animation
***Note: in mulpatcher the animID is hex #, UOFIddler uses decimal #)***
Got to “Settings” tab, click “Save” next to tiledata to save it .
You can now close mulpatcher if you want...OR...
*************************Optional for shrunk pets****************************************
**You will need to have one bmp file that is the size for a shrunk pet, roughly 30x45px**
Go to “ArtS” tab, select empty slots
Find an empty slot, right click and select “Load from Bitmap”
Add the reduced bmp image of your new animation.
Go to “Settings” and save art.mul and art.idx
Close mulpatcher
*********************************************************************************************
Step 9- Other edits that will be needed
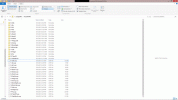
bodyconv.def:
You will need to add your new animation here, this tells the client where to get the animation from.
This is telling the client that slot 353 is being used and to find it in anim.mul/anim.idx slot 353 and no other slots in other anim#.muls are being used.
[animation slot # (anim2) (anim3) (anim4) (anim5) #name of your animation]
**you can add animations to other anim#.muls**
Corpse.def:
This is telling the client that animation 353 should use the death animation # 353 for a corpse, the 0 is the corpse hue.
***This is not always needed, but I add just in case***
Mobtypes.txt:
This sets the animation "type" (animal, moster, equipment, etc)
***Note: you must enter the #name ~exactly~ like you did for the bodyconv.def***
***Changing the type ANIMAL to MONSTER changes the animation blocks available to use***
body.def:
This is also not always needed, but if you find you are having issues with an animation not showing up you can add them here. (I did add this for a nightmare due to this issue)
Shrink.cfg:
If you added a mount, and art for shrinking.
**This example is a Cusidhe**
277 is the animation #, and 0x2d96 is the itemID found in the tiledata.mul.
Step 1-Organization
**I have already covered how to edit & extract bmp files from a flc or gif**
You should have each animation type extracted into a folder named for it's type.
(Ex: the animation for walk,run,death,etc should be in a folder named “walk” , “run”, “death”, etc)
You will now need to add sub-folders inside each animation type folder for each direction
Ex: Inside folder “walk” you should add folders named:
“Down”
“Down Left”
“Left”
“Up Left”
“Up”
***optional but advisable***
“Not Needed”
Now you should have a main folder “walk”, with 5 sub-folders, and all the walk.bmps
Ex: “C:\Royal Griffin\Walk\Down”
You will now select all the bmps for each direction and place them into it's respective sub-folder.
Ex:all walking animations facing down should be placed into the “Down” folder.
"C:\Royal Griffin\Walk\Down\down_53.bmp”
This should be done for all other directions, place all the right facing bmps into the “Not Needed” folder if you have made this folder. You can now select the first bmp in each sub-folder, press ctrl+a to select all, press f2 to rename all bmps to it's animation type, direction and sequence number
walk32.bmp-> walkdown_1.bmp. (windows will auto number the files for you)
Step 2- Low or High Creatures
You will now need to decide if you want your animation to be a low level creature or a high level creature
The two big differences in low and high are:
1. Run is only available to low creatures
***This is needed for mounts***
2. High has more frames per slot and more slot types
3. Animation types Eat / Stomp
*****Please refer to the rar for the breakdown*****
Step 3- Selecting your frames
**I will be using a high level creature for this tutorial; it can be used with the low level creatures too**
You may have more walk.bmps than we will be able to use, and will now have the tricky part of selecting what frames you will want to keep.
Since I am using a high level creature, I can only have 10 frames for any walk bmp (walkdown, walkDL,etc)
This part is completely up to you on what you want your animation to look like, but you can only select 10 frames per direction:
walkdown=10, walkDL=10, walkleft=10, etc
***Right side has more frames than the left!?!?***
If you run into this problem, and you made the optional folder “Not Needed”, then you can simply use a program like photoshop, corel photopaint, etc. to flip the bmp image horizontally. Use these flipped images in place of the original left facing bmps. Now you should have the same amount in each sub-folder.
***I don't have an animation named “x”***
I didn't have an animation for “BlockRight”, I simply looked at the red dragon's animation for this and used a similar animation set up.
Ex: I used animation “ForifyWalk”, but it was just walking. So I looked for the number of frames I could use and made mine with selected bmps, and renamed them to reverse the order of the numbers.
**You can mis-match frames from any animation type or direction to get the final results you are looking for!**
****Helpful Tips****
Make a backup copy of your starting animations (flc, gifs, or bmps)...and DO NOT TOUCH THEM!!
Do NOT empty your recycle bin until you are 100% positive that, that animation is complete!
You can “test” your animation sequence with the bmps (no need to re-make a flc/gif)
To do this:
Make sure you can see a preview of the image inside the folder (Should be on the right side of the window)
You should have renamed your frames so they will all have the same names and numbers for sequence;
click the first frame and scroll through the rest with the right arrow button ~slowly~ .
Short cut keys are helpful when dealing with many files
here is a quick list:
ctrl+a (select all)
ctrl+c (copy)
ctrl+x (cut)
ctrl+v (paste)
ctrl+z (undo)
ctrl+s (save)
f2 (rename)
**photoshop only**
f1 or whichever short cut you choose for quickly flipping image

Step 4- Calculations
***Tools Needed for next steps***
-mulpatcher
-UO Animation Calculator
-UOAnim
-michelangelo
-UOfiddler
Mulpatcher.exe:
Open mulpatcher.exe and load your anim.mul and anim.idx files
***A docker window will pop up and tell you that anything you do in the anim files will be done “on the fly”***
Scroll all the way to the left and select the “Anim” tab
Select “Empty Slots”
Select an empty slot for your animation:
H=high level
L= low level
P=People & Wearables
Make a note on the number you have selected and close mulpatcher.exe.
***I am going to use slot H:0x4F (79) for this tutorial ***
UO Animation Calculator:
Open UO Animation Calculator and type in the number (decimal value) for the slot you selected and hit enter. Make a note of the number for “First Animation Frame”
***slot # 79 has first animation frame number: 8690***
Close UO Animation Calculator
UOFiddler or breakdown.rar:
I suggest pre-making folders for each animation type with the # and name of animation type. You can look in UOFiddler or the breakdown.odt for examples of animations that are used.
Ex: 0-Walk, 1-Idle,etc
Step 5- .bmp to .uop
UOAnim:
Open UOAnim and click the “Add Animation” button, and type in the number from UO Animation Calculator's “First Animation Frame” in the “Block Number” and click OK.
** This will start the first set of animations in the sequence “walk” **
***The sequence for UO is always Down, Down Left, Left, Up Left, Up***
****UO uses a flip technique for the right side of animations,
so right is not needed****
Next, click the “Add Image” button and load the first bmp for “WalkDown”
Continue adding all the bmps for Down via the “Add Image” button
** WARNING: If you mess up you will have to start over, so be meticulous! **
**This is the reason for all the “Organization” earlier**
Once you have added all the frames for WalkDown.bmp, we can move on to WalkDL (down left)
We will repeat what we did above with “Add Animation”, but this time we will change the “Block Number” to +1
Ex: 8691 (8690 +1)
Repeat these steps until you have all (5) animation directions done, then click “Create Patch”
and save as “0-walk”. This will make a 0-walk.uop.
**Take note of the last number of the 0-walk animation block number**
Close and re-open UOAnim
Repeat above steps for the next animation set, but increase the block number by +1
Ex: 8694 was my last block number for 0-walk, so my first block number for 1-Idle will be 8695
***Repeat all of the above steps in UOAnim for all the animation types & directions***
You should now have 1 .uop file for each animation type (walk, idle, etc, etc) saved

Step 6- .uop to .vd
Michelangelo:
Open michelangelo and click “Import”
Import the first animation uop (0-walk.uop)
continue importing all the uop files until all are within michelangelo
**Note that you will need to import each animation uop in order from 0 to last #**
*************************Suggestion, but not nessesary*****************************
I like to save my completed uop file, so at this point I would suggest clicking “save” and saving your total animation.. “AnimationName.uop”
Ex:RoyalGriffin.uop
*********************************************************************************************
Now, export this into a verdata.mul
** You can make a new verdata.mul by making a new text document and re-naming it “verdata.mul” make sure to delete the .txt extension. **
Close michelangelo
Mulpatcher:
Open mulpatcher and load your anim.mul, anim.idx, and your new verdata.mul.
Scroll all the way to the left and select the “Anim” tab, then select full slots.
**You can search for the slot # you used for your animation, it will be fairly easy to find as it's color is green.**
Once you find your animation, click to select it, then right click and “Save to File”.
**You can name this anything you want, or leave the slot number for the name**
Close mulpatcher
Step 7- .vd to .mul
Mulpatcher:
Open mulpatcher and load:
anim.mul
anim.idx
tiledata.mul
art.mul
art.idx
**Optional**
**one of the other anim#.muls**
Go to “Anim” tab and go to your animation slot number
Single click it to select, then right click and “Load from File”
Located YourAnimationName.vd or slot#.vd and load it.
Step 8- **Only for mounts**
**This step only works with clients up to 7.0.8.2 at this time**
Go to the TileDataS tab and click “Fill Slots to 0x7FFF”
Find an empty slot, and set:
Name: Your Animation's Name Mount
AnimID: Your Animation's animation #
Weight: 1
Height: 1
Quality: 25
check:
Wearable, and Animation
***Note: in mulpatcher the animID is hex #, UOFIddler uses decimal #)***
Got to “Settings” tab, click “Save” next to tiledata to save it .
You can now close mulpatcher if you want...OR...
*************************Optional for shrunk pets****************************************
**You will need to have one bmp file that is the size for a shrunk pet, roughly 30x45px**
Go to “ArtS” tab, select empty slots
Find an empty slot, right click and select “Load from Bitmap”
Add the reduced bmp image of your new animation.
Go to “Settings” and save art.mul and art.idx
Close mulpatcher
*********************************************************************************************

Step 9- Other edits that will be needed
bodyconv.def:
You will need to add your new animation here, this tells the client where to get the animation from.
Code:
Ex: 353 -1 -1 -1 -1 #TigerThis is telling the client that slot 353 is being used and to find it in anim.mul/anim.idx slot 353 and no other slots in other anim#.muls are being used.
[animation slot # (anim2) (anim3) (anim4) (anim5) #name of your animation]
**you can add animations to other anim#.muls**
Corpse.def:
This is telling the client that animation 353 should use the death animation # 353 for a corpse, the 0 is the corpse hue.
***This is not always needed, but I add just in case***
Code:
#Tiger
353 {353} 0
Mobtypes.txt:
This sets the animation "type" (animal, moster, equipment, etc)
***Note: you must enter the #name ~exactly~ like you did for the bodyconv.def***
Code:
353 ANIMAL 0 #Tiger***Changing the type ANIMAL to MONSTER changes the animation blocks available to use***
body.def:
This is also not always needed, but if you find you are having issues with an animation not showing up you can add them here. (I did add this for a nightmare due to this issue)
Code:
#New Nightmare
354 {354} 0
Shrink.cfg:
If you added a mount, and art for shrinking.
**This example is a Cusidhe**
Code:
277 0x2D96277 is the animation #, and 0x2d96 is the itemID found in the tiledata.mul.
Attachments
Last edited:

