I've posted this so many times in so many different places, but I'm hoping this time it'll stick around. 
I felt the XmlQuestNPC on XmlSpawner Fan needed to be updated to really show people how to create quests that could be as complex or as simple as they wanted. There is going to be a lot of reading here, but I'm also including screenshots as I go, so hopefully between the two, you'll have a strong grasp of how this all works.
Step 1. [add XmlQuestNPC, then freeze him in place. Wandering Quest NPCs can be annoying when editing them. [Props your Quest NPC and change their gender and/or name before you edit them, it just makes things easier.
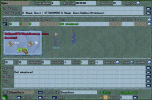
Step 2. [XmlEdit and target the Quest NPC. This will open the XmlQuestNPC dialog editor. I'll do my best to explain what this stuff means and what I'm using for this quest and what is important. Across the top of the window, you'll see two fields:
TrigOnCarried-This field can be left blank, or set to a specific item the players HAVE to be carrying in order to trigger the dialog with the Quest NPC. The PROPER format is the NAME of the item, NOT the classname!
For example, lets say players have to be carrying a thinlongsword. The thinlongsword is the classname, but the name you will use in the TrigOnCarried field will be the name that is displayed when you hover over the item in game. So like thinlongsword, classname, could have the name of Samson's Long Sword. That is what you would enter into the TrigOnCarried: Samson's Long Sword. You can also use questholders as triggers, just use the name of the questholder along with the number of the objective that must be COMPLETE for it to trigger. You can have 5 objectives total, so as an example, you could use the questholder for this quest as the TrigOnCarried: A Simple Quest,1. This means that if they have completed the first objective, it will trigger the Quest NPC. If you want the Quest NPC to trigger without any objectives, you can use 0 instead, A Simple Quest,0. So 0-5 work as conditions on carried questholders. (This will also work for the NoTrigOnCarried. see below) If you would like to have multiple items to trigger the Quest NPC, use the | with a space on either side to separate items. (This will also work for the NoTrigOnCarried see below). If two or more items must be used to trigger the Quest NPC, use the & between items with a space on both sides. (This will also work for the NoTrigOnCarried see below).
Format
1 Item:TrigOnCarried-A Simple Quest,0
2 or more Items (either or item will trigger): TrigOnCarried-A Simple Quest,0 | Samson's Long Sword
2 or more Items (both must be present to trigger): TrigOnCarried-A Simple Quest,0 & Samson's Long Sword
NoTrigOnCarried-This field can be left blank, or set to a specific item, or items to prevent the Quest NPC from triggering. This is especially helpful to prevent players from getting multiple questholders and only completing the quest one time, but getting credit in every questholder they are carrying. Normally you'll want to include the questholder name, A Simple Quest, and the attachment name, ATTACHMENT,A Simple Quest,XmlQuestAttachment. The text between the two commas should always be the name of the questholder for the attachment. (ATTACHMENT,Questholder Name,XmlQuestAttachment. You can include multiple items to prevent the Quest NPC from trigger, but at least you'll want to include the questholder name and the attachment name.
Format
2 Items:NoTrigOnCarried-A Simple Quest | ATTACHMENT,A Simple Quest,XmlQuestAttachment
2 Items (using the objectives):NoTrigOnCarried-A Simple Quest,0 | ATTACHMENT,A Simple Quest,XmlQuestAttachment
Once you have the TrigOnCarried and NoTrigOnCarried fields taken care of, click the ADD button at the bottom. This will add Line 10 to the dialog box. The lines increase by 10s, so 10, 20, 30, etc. The important things to notice here are the DependsOn box and the Text field. The DependsOn says 0, this is VERY important and you'll see why in the next step. For now, just remember to put a 0 in this box. The text field is the text the Quest NPC says when they are triggered. They don't have to say anything at all and can go right into the quest dialog, but for RPing and troubleshooting, having something in the text field helps.
The last important field here is the Save to file field. This is where you will name the dialog so you can load it on a spawner and attach it to a QuestNPC. In your XmlSpawner folder, you can create another folder called XmlQuestNPC and save all the QuestNPC config files in that folder. By default, if this folder doesn't exist, it will save the config files in your root RunUO folder. The first time you save the file, it will just give you a system message that says it was saved. From then on, everytime you save it, it will ask you to overwrite the existing file.
Step 3. [Add XmlSpawner and target the ground. Click the book button for your first spawner entry, you'll need all the extra space. If you've already named your QuestNPC and picked their gender, the proper format is:
XmlQuestNPC,(0 for male, 1 for female, 2 for both)/Name/QuestNPC's Name
Then you'll want to setup the config file so it loads with this QuestNPC:
ConfigFile/filename/LoadConfig/True
So the example format would look like this:
There are more advanced techniques for spawning like clothing, weapons, etc, which direction they should be facing, and talktext for example. If you don't want your QuestNPC to walk around, set the Xmlspawner properties to SpawnRange=0, and HomeRange=0. SpawnRange is the tile space from the spawner the mob will spawn, and HomeRange is the area the mob will walk around in.
I mentioned talktext, that is the text used to trigger the QuestNPC when a player single clicks on them, much like they would for a vendor to buy or sell something. Talktext is always a KEYWORD used in the XmlDialog editor. In this example, I'll be using some talktext ON the spawner and the exact same talktext as a KEYWORD in the XmlDialog editor. These two things HAVE to be exactly the same. So talktext of yes! is NOT the same as keyword Yes!, they are different. You can use entire phrases if you want, but in keeping this a little simple, we're just going to say Hi! as the talktext and Hi! as the keyword. NOTE: You can enter the talktext on the spawner at any point, but to remove annoying error messages in the spawner window, go back and add the talktext after you finish setting up the XmlDialog.
Here is an example of a spawner entry for a Quest NPC:
Step 4. Now that we have our QuestNPC setup, spawn him/her, then [XmlEdit and target the QuestNPC to get the XmlDialog window to open again. If you see an empty window, you have NOT LOADED THE CONFIG FILE, check your syntax on the spawner again. You will see Line 10 as well as Line 0 underneath it. Where did Line 0 come from, you didn't add a Line 0. Line 0 comes from adding the QuestNPC to a spawner and loading a config file from an incomplete dialog. This is NORMAL and it's fine. The very first thing you should do is click the Refresh button at the bottom. You'll see Line 0 move above Line 10. This is what we want. XmlDialog entries go in numeric order, unless a DependsOn box indicates a different path the dialog should take. Remember when I told you to enter a 0 in the DependsOn box for Line 10, well now that Line 0 has appeared, I'll explain what the DependsOn box actually does.
DependsOn-This field is used to link different Lines in the dialog to one another and/or used to allow for the TrigOnCarried and NoTrigOnCarried fields to be taken in to consideration for triggering, or preventing the QuestNPC from triggering.
In Line 0 DependsOn box- If you enter a -2 both the TrigOnCarried and NoTrigOnCarried fields will be checked prior to the QuestNPC actually triggering. If left blank, or with a value of 0 or 1, the TrigOnCarried and NoTrigOnCarried fields will be IGNORED.
Linking lines to one another-If you enter in a line number in the DependsOn box, the editor will look to see if the conditions have been met from the Line you entered. Since in Line 10 DependsOn box we entered a 0, that means the editor looks at the conditions on Line 0 to see if they have been met.
The entry for Line 0 should have a -2 in the DependsOn box and Line 10 should have a 0 in the DependsOn box along with Hail adventurer in the Text field.
Step 5. Further configuring the XmlDialog for the XmlQuestNPC.
Click the ADD button and Line 20 will appear. Line 20 should have a 10 in the DependsOn box and we are also going to enter our talktext as the Keyword for Line 20. So, in the Keywords field, enter Hi!
From here we will build the rest of the quest line. At the bottom of the XmlDialog window, you will see a GUMP field. This is what the QuestNPC will display to the players. There are several different types of gumps, you can experiment with different ones to get the desired gump you wish to have. In this example, we will be using Gump 4. Gump 4 gives us the option of specifying keywords to take different paths within the quest dialog. Something as simple as a Yes, or No can work, but more custom responses will work as well. Using Gump 4, the formatting should be as such:
GUMP,QuestNPC Name,4/Would you help me?.;Sure, I'll do that for you.;yes;No, I don't think I care to help you.;no
After the / it should be quest dialog text, with punctuation a ; followed by the player's first response option, with punctuation (this is what they will see in the quest window) followed by a ; and the first keyword to be linked to another Line entry, then another ; followed by the second response option with punctuation another; and the second keyword to be linked to another Line entry. (Dialog;text;response;text;response)
The number after the QuestNPC Name is the gump style you wish to use. The keywords are invisble to players, but they are "spoken" to the Quest NPC and used to navigate through the dialog. When a button is clicked, the keyword is sent to the Quest NPC.
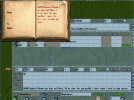
Step 6. Click the ADD button and Line 30 will appear.
Now the fun really begins. Line 30 will be triggered by the keyword yes from Line 20's dialog response. So type in the word yes in the keywords field and put 20 in the DependsOn box because Line 30 depends on the response from Line 20. Then go down to the Action field.
The Action field-This field contains things the QuestNPC is going to do. Like giving the players the questholder and/or quest items they need during the quest. Multiple command entries here should be seperated by a space ; space
It's easier to have multiple commands handled in one GIVE field than it is to setup tons of extra dialog to keep giving things to the player. Normally you would give the player the questholder and add certain specifications to it. The format for questholders can be quite complicated so I'll try and explain things as I go through the entire command.
Format
GIVE (the command you want the Quest NPC to do)/<questholder (this gives the players a blue quest log book)/name/A Simple Quest (this names the quest log book A Simple Quest)/titlestring/A Simple Quest (this gives the quest a name in the quest window, if not entered, you will see the title of the quest as "a quest)/notestring (this is where the actual text is entered for the quest and what the player's see when they open the quest log book)/Kill the wolf that has been eating my sheep./Objective1/KILL,greywolf,1(this is the first item players will see under their objectives using the command word KILL. The number after greywolf indicates how MANY they have to kill)/Description1/Kill a wolf prowling the fields. (this is the TEXT players will see under the objective heading.)/addjournalentry (this command allows you to add additional information about the quest under the Journal tab in the Quest Dialog window.)You should look in the following places: Brit Farms (by typing it this way with the : it makes the first part of the journal entry the heading and underlines it with the rest listed underneath it.)/PartyEnabled/true (this allows players to group together to complete the quest objectives.)/autoreward/true(setting autoreward to true means as soon as the player(s) has completed the quest, they get the reward, the quest log book is deleted, and they get the quest points.)/CanSeeReward/False (When you add a reward, it shows in the quest dialog window, but I've found that you can click on any container you put there and it causes the client to freeze, so setting CanSeeReward to false prevents the player(s) from clicking a container.)/Difficulty/2(this is used to change the default value of the quest from 1 to whatever number you want, this controls how many points the quest is worth.)/rewardstring/@bag/ADD/Gold,500/ADD/Lantern (this adds a bag to the quest dialog window with 500 gold in it and a lantern. If you want to give the player Fame and/or Karma when the quest is completed, you must add an AttachmentString before the RewardString. (See second code example).)[/I]
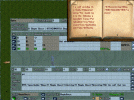
Step 7. Click the ADD button and you will see Line 40 appear. Enter no as the keyword, type 20 in the DependsOn box again because it's depending on the response picked from Line 20, and in the Text field type Fine, see if I ask you again! This will add an entry so that if the player decides not to do the quest and clicks the negative response, the keyword no is passed and the quest dialog window closes and the Quest NPC says: Fine, see if I ask you again!
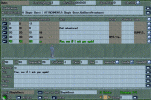
That's it! You've completed your first XmlQuestNPC!!
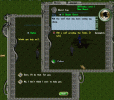
Here is the final product of your hard work!
I felt the XmlQuestNPC on XmlSpawner Fan needed to be updated to really show people how to create quests that could be as complex or as simple as they wanted. There is going to be a lot of reading here, but I'm also including screenshots as I go, so hopefully between the two, you'll have a strong grasp of how this all works.
Step 1. [add XmlQuestNPC, then freeze him in place. Wandering Quest NPCs can be annoying when editing them. [Props your Quest NPC and change their gender and/or name before you edit them, it just makes things easier.

Step 2. [XmlEdit and target the Quest NPC. This will open the XmlQuestNPC dialog editor. I'll do my best to explain what this stuff means and what I'm using for this quest and what is important. Across the top of the window, you'll see two fields:
TrigOnCarried-This field can be left blank, or set to a specific item the players HAVE to be carrying in order to trigger the dialog with the Quest NPC. The PROPER format is the NAME of the item, NOT the classname!
For example, lets say players have to be carrying a thinlongsword. The thinlongsword is the classname, but the name you will use in the TrigOnCarried field will be the name that is displayed when you hover over the item in game. So like thinlongsword, classname, could have the name of Samson's Long Sword. That is what you would enter into the TrigOnCarried: Samson's Long Sword. You can also use questholders as triggers, just use the name of the questholder along with the number of the objective that must be COMPLETE for it to trigger. You can have 5 objectives total, so as an example, you could use the questholder for this quest as the TrigOnCarried: A Simple Quest,1. This means that if they have completed the first objective, it will trigger the Quest NPC. If you want the Quest NPC to trigger without any objectives, you can use 0 instead, A Simple Quest,0. So 0-5 work as conditions on carried questholders. (This will also work for the NoTrigOnCarried. see below) If you would like to have multiple items to trigger the Quest NPC, use the | with a space on either side to separate items. (This will also work for the NoTrigOnCarried see below). If two or more items must be used to trigger the Quest NPC, use the & between items with a space on both sides. (This will also work for the NoTrigOnCarried see below).
Format
1 Item:TrigOnCarried-A Simple Quest,0
2 or more Items (either or item will trigger): TrigOnCarried-A Simple Quest,0 | Samson's Long Sword
2 or more Items (both must be present to trigger): TrigOnCarried-A Simple Quest,0 & Samson's Long Sword
NoTrigOnCarried-This field can be left blank, or set to a specific item, or items to prevent the Quest NPC from triggering. This is especially helpful to prevent players from getting multiple questholders and only completing the quest one time, but getting credit in every questholder they are carrying. Normally you'll want to include the questholder name, A Simple Quest, and the attachment name, ATTACHMENT,A Simple Quest,XmlQuestAttachment. The text between the two commas should always be the name of the questholder for the attachment. (ATTACHMENT,Questholder Name,XmlQuestAttachment. You can include multiple items to prevent the Quest NPC from trigger, but at least you'll want to include the questholder name and the attachment name.
Format
2 Items:NoTrigOnCarried-A Simple Quest | ATTACHMENT,A Simple Quest,XmlQuestAttachment
2 Items (using the objectives):NoTrigOnCarried-A Simple Quest,0 | ATTACHMENT,A Simple Quest,XmlQuestAttachment
Once you have the TrigOnCarried and NoTrigOnCarried fields taken care of, click the ADD button at the bottom. This will add Line 10 to the dialog box. The lines increase by 10s, so 10, 20, 30, etc. The important things to notice here are the DependsOn box and the Text field. The DependsOn says 0, this is VERY important and you'll see why in the next step. For now, just remember to put a 0 in this box. The text field is the text the Quest NPC says when they are triggered. They don't have to say anything at all and can go right into the quest dialog, but for RPing and troubleshooting, having something in the text field helps.
The last important field here is the Save to file field. This is where you will name the dialog so you can load it on a spawner and attach it to a QuestNPC. In your XmlSpawner folder, you can create another folder called XmlQuestNPC and save all the QuestNPC config files in that folder. By default, if this folder doesn't exist, it will save the config files in your root RunUO folder. The first time you save the file, it will just give you a system message that says it was saved. From then on, everytime you save it, it will ask you to overwrite the existing file.
Step 3. [Add XmlSpawner and target the ground. Click the book button for your first spawner entry, you'll need all the extra space. If you've already named your QuestNPC and picked their gender, the proper format is:
XmlQuestNPC,(0 for male, 1 for female, 2 for both)/Name/QuestNPC's Name
Then you'll want to setup the config file so it loads with this QuestNPC:
ConfigFile/filename/LoadConfig/True
So the example format would look like this:
Code:
XmlQuestNPC,0/Name/Ogden/ConfigFile/SimpleQuest/LoadConfig/TrueI mentioned talktext, that is the text used to trigger the QuestNPC when a player single clicks on them, much like they would for a vendor to buy or sell something. Talktext is always a KEYWORD used in the XmlDialog editor. In this example, I'll be using some talktext ON the spawner and the exact same talktext as a KEYWORD in the XmlDialog editor. These two things HAVE to be exactly the same. So talktext of yes! is NOT the same as keyword Yes!, they are different. You can use entire phrases if you want, but in keeping this a little simple, we're just going to say Hi! as the talktext and Hi! as the keyword. NOTE: You can enter the talktext on the spawner at any point, but to remove annoying error messages in the spawner window, go back and add the talktext after you finish setting up the XmlDialog.
Here is an example of a spawner entry for a Quest NPC:
Code:
XmlQuestNPC,0/Name/Ogden/talktext/Hi!/Direction/South/ConfigFile/SimpleQuest/LoadConfig/TrueDependsOn-This field is used to link different Lines in the dialog to one another and/or used to allow for the TrigOnCarried and NoTrigOnCarried fields to be taken in to consideration for triggering, or preventing the QuestNPC from triggering.
In Line 0 DependsOn box- If you enter a -2 both the TrigOnCarried and NoTrigOnCarried fields will be checked prior to the QuestNPC actually triggering. If left blank, or with a value of 0 or 1, the TrigOnCarried and NoTrigOnCarried fields will be IGNORED.
Linking lines to one another-If you enter in a line number in the DependsOn box, the editor will look to see if the conditions have been met from the Line you entered. Since in Line 10 DependsOn box we entered a 0, that means the editor looks at the conditions on Line 0 to see if they have been met.
The entry for Line 0 should have a -2 in the DependsOn box and Line 10 should have a 0 in the DependsOn box along with Hail adventurer in the Text field.
Step 5. Further configuring the XmlDialog for the XmlQuestNPC.
Click the ADD button and Line 20 will appear. Line 20 should have a 10 in the DependsOn box and we are also going to enter our talktext as the Keyword for Line 20. So, in the Keywords field, enter Hi!
From here we will build the rest of the quest line. At the bottom of the XmlDialog window, you will see a GUMP field. This is what the QuestNPC will display to the players. There are several different types of gumps, you can experiment with different ones to get the desired gump you wish to have. In this example, we will be using Gump 4. Gump 4 gives us the option of specifying keywords to take different paths within the quest dialog. Something as simple as a Yes, or No can work, but more custom responses will work as well. Using Gump 4, the formatting should be as such:
GUMP,QuestNPC Name,4/Would you help me?.;Sure, I'll do that for you.;yes;No, I don't think I care to help you.;no
After the / it should be quest dialog text, with punctuation a ; followed by the player's first response option, with punctuation (this is what they will see in the quest window) followed by a ; and the first keyword to be linked to another Line entry, then another ; followed by the second response option with punctuation another; and the second keyword to be linked to another Line entry. (Dialog;text;response;text;response)
The number after the QuestNPC Name is the gump style you wish to use. The keywords are invisble to players, but they are "spoken" to the Quest NPC and used to navigate through the dialog. When a button is clicked, the keyword is sent to the Quest NPC.

Step 6. Click the ADD button and Line 30 will appear.
Now the fun really begins. Line 30 will be triggered by the keyword yes from Line 20's dialog response. So type in the word yes in the keywords field and put 20 in the DependsOn box because Line 30 depends on the response from Line 20. Then go down to the Action field.
The Action field-This field contains things the QuestNPC is going to do. Like giving the players the questholder and/or quest items they need during the quest. Multiple command entries here should be seperated by a space ; space
It's easier to have multiple commands handled in one GIVE field than it is to setup tons of extra dialog to keep giving things to the player. Normally you would give the player the questholder and add certain specifications to it. The format for questholders can be quite complicated so I'll try and explain things as I go through the entire command.
Format
GIVE (the command you want the Quest NPC to do)/<questholder (this gives the players a blue quest log book)/name/A Simple Quest (this names the quest log book A Simple Quest)/titlestring/A Simple Quest (this gives the quest a name in the quest window, if not entered, you will see the title of the quest as "a quest)/notestring (this is where the actual text is entered for the quest and what the player's see when they open the quest log book)/Kill the wolf that has been eating my sheep./Objective1/KILL,greywolf,1(this is the first item players will see under their objectives using the command word KILL. The number after greywolf indicates how MANY they have to kill)/Description1/Kill a wolf prowling the fields. (this is the TEXT players will see under the objective heading.)/addjournalentry (this command allows you to add additional information about the quest under the Journal tab in the Quest Dialog window.)You should look in the following places: Brit Farms (by typing it this way with the : it makes the first part of the journal entry the heading and underlines it with the rest listed underneath it.)/PartyEnabled/true (this allows players to group together to complete the quest objectives.)/autoreward/true(setting autoreward to true means as soon as the player(s) has completed the quest, they get the reward, the quest log book is deleted, and they get the quest points.)/CanSeeReward/False (When you add a reward, it shows in the quest dialog window, but I've found that you can click on any container you put there and it causes the client to freeze, so setting CanSeeReward to false prevents the player(s) from clicking a container.)/Difficulty/2(this is used to change the default value of the quest from 1 to whatever number you want, this controls how many points the quest is worth.)/rewardstring/@bag/ADD/Gold,500/ADD/Lantern (this adds a bag to the quest dialog window with 500 gold in it and a lantern. If you want to give the player Fame and/or Karma when the quest is completed, you must add an AttachmentString before the RewardString. (See second code example).)[/I]
Code:
GIVE/<questholder/Name/A Simple Quest/titlestring/A Simple Quest/Notestring/Kill the wolf that has been eating my sheep./Objective1/KILL,greywolf,1/Description1/Kill a wolf prowling the fields./Addjournalentry/You should look in the following places:Brit Farms/PartyEnabled/True/Autoreward/True/CanSeeReward/False/Difficulty/2/Rewardstring/@bag/ADD/Gold,500/ADD/Lantern>
Code:
GIVE/<questholder/Name/A Simple Quest/titlestring/A Simple Quest/Notestring/Kill the wolf that has been eating my sheep./Objective1/KILL,greywolf,1/Description1/Kill a wolf prowling the fields./Addjournalentry/You should look in the following places:Brit Farms/PartyEnabled/True/Autoreward/True/CanSeeReward/False/Difficulty/2/AttachmentString/XmlAddKarma,200/Rewardstring/@bag/ADD/Gold,500/ADD/Lantern>
Step 7. Click the ADD button and you will see Line 40 appear. Enter no as the keyword, type 20 in the DependsOn box again because it's depending on the response picked from Line 20, and in the Text field type Fine, see if I ask you again! This will add an entry so that if the player decides not to do the quest and clicks the negative response, the keyword no is passed and the quest dialog window closes and the Quest NPC says: Fine, see if I ask you again!

That's it! You've completed your first XmlQuestNPC!!
Here is the final product of your hard work!

