Safera
Member
HOW-TO ADD NEW CLOTHING (and other custom wearables) TO YOUR SHARD
What this tutorial covers:
How to add new wearables to your server using UOFiddler.
What this tutorial does not cover:
How to make custom artwork or animations.
What you need before beginning this tutorial:
Always backup your files first!
Getting started...
ADDING YOUR PAPER DOLL GUMP ART:
A. ASSIGNING YOUR GRAPHICS TO AN ALREADY-EXISTING ANIMATION:
SAVE - OVERWRITE YOUR OLD FILES:
1. Navigate to your UOFiddler folder (usually C:\Users\user\AppData\Roaming\UoFiddler).
2. Copy your updated files: art.mul, artidx.mul, Gumpart.mul, Gumpidx.mul, tiledata.mul
3. Paste/overwrite to your CLIENT directory.
MAKE THE WEARABLE SCRIPT SO YOU CAN ADD IT IN-GAME:
1. Open a text editor and write a basic wearable script (see attachment).
2. Change the name of the item, type of the item (layer) and the Item ID (e.g. "ItemID = 50400;")
3. Save your Script to your server/emulator folder.
4. Restart your server/emulator and login.
5. [add WearableName (example: "[add LongFancyShirt")
---------------------------------------------
B. ASSIGNING YOUR GRAPHICS TO A NEW ANIMATION
Additional Information:
HOW TO EXPORT A .VD FILE OF A CURRENT ANIMATION THAT YOU CAN EDIT THEN USE WITH YOUR NEW ARTWORK:
1. In UOFiddler, navigate to ANIMATIONS > EQUIPMENT and find the animation that is closest to what your clothing looks like and take note of the number in parenthesis after the name (e.g.
elven robe e02 (899)")
2. At the bottom of the Animations screen, Go to SETTINGS > ANIMATION EDIT
3. At the top left of the Animation Edit screen, choose "Choose Anim File" > anim
4. Scroll down to the animation that you want to duplicate, right click on the name, and choose "Export > "To .vd"
5. This will export your animation to the default UOFiddler folder (usually C:\Users\dedicated\AppData\Roaming\UoFiddler)
FAQ:
What if there's no animation to export as a .vd for my choice?
If you cannot export a .vd file then the words for the file will be in red ("P:517(517)").
It probably means they are using another animation that has been rehued in that slot, find the original animation that this one is based on and use it.
If you can't find it, choose another animation that does allow you to export the .vd file.
For instance, I wanted to use "elven robe e02 (899)", but found that it was actually just a rehued "Kamishimo (517)", so I used it instead.
However, the animation info for the Kamisho (517) was actually located in "anim4", not "anim".
Navigating to "anim4", we see that Kamisho (517) is actually using the animation for
Note: While I haven't tried this yet, it appears that in order to install new animations, you will have to use the open animation slots from 400-499 only.
Do I have to export the .vd and re-import it or can I use the same animation for multiple items?
You can re-use the same animations for multiple articles of clothing by altering the Body.def file.
--------------------------------------------
Useful links:
http://www.runuo.com/community/threads/custom-artwork-how-to.54706/
http://www.runuo.com/community/thre...r-animal-vd-animations-to-empty-spots.468206/
http://forums.polserver.com/viewtopic.php?f=32&t=3025
**an extra special thank you to M309, Hammerhand, and Milva for their hands in helping me figure this all out.**
What this tutorial covers:
How to add new wearables to your server using UOFiddler.
What this tutorial does not cover:
How to make custom artwork or animations.
What you need before beginning this tutorial:
- UOFiddler
- Icon image of the Item that will appear in game on the ground or in the backpacks as loot (.bmp, .tiff, or .jpg only)
- Paperdoll image of the clothing/wearable (.bmp, .tiff, or .jpg only)
- (Optional) Animations for all directions for your clothing as it will appear when moving in-game (.vd file)
Always backup your files first!
Getting started...
ADDING YOUR PAPER DOLL GUMP ART:
- Open UOFiddler and navigate to the GUMPS tab
- Once in the GUMPS tab, in the top left, click on Misc > Show Free Slots
- Scroll down past the intro & spell icon graphics to 0xC350 (50000). Chose a red open space to place your wearable.
Notes about which slot to place your wearable in:
All default* wearables must be placed in slots 50000-50999.
However, there is a possibility that unless your wearable is in between the following slots, it will disappear when you sit:
So, if your wearable needs to appear properly in the sitting position, put it in between slots 0xC4E (50400) and 0xC737 (50999).
Default* wearables are the default graphics used when either no gender or male gender is selected.
If you have an item wearable by only females that corresponds to a wearable that also has a male version of the same, you place the female version of the same in the corresponding 60000 range. (for example, if your default/male long fancy shirt is in spot #50400, then the corresponding female long fancy shirt would go in spot #60400.
Because UOFiddler doesn't let you see empty decimal numbers until you hit Save, this hex/dec convertor may come in handy helping you figure out slot numbers if you are trying to match up male/female hex/dec numbers.
http://www.mathsisfun.com/binary-decimal-hexadecimal-converter.html - Once you have chosen an empty slot, right click on the red letters and click "Replace". Navigate to the gump art .bmp or .tiff that you would like to use and choose "Open".
- Lastly, right-click again and choose "Save".
- Now navigate to the ITEMS tab.
- Right click and choose "Insert at". Type in the number of the spot where you added your image in the Gumps tab (in our case it was number 50400). This number should be the same number used in the Gumps tab.
- Once added, right click and hit "Save".
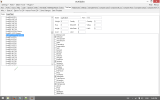
- Now, navigate to the TILEDATA tab.
- Scroll down to the same slot number you added the graphics to (in our example case, number 50400).
- The minimum things that need to be filled in are:
- A. the WEARABLE flag needs to be checked and
- B. the ANIM number needs to be Your Gump ID # minus 50000 (in our example case, type in 400 (504000-50000=400)).
Optionally,- A. NAME can be filled in with whatever you'd like to call your wearable.
- B. Either ARTICLEA or ARTICLEAN can be checked depending if you want "a" or "an" to appear before the wearable's name in game (for example "a" long fancy shirt).
- C. QUALITY should be the layer number of the wearable (but does not have to be filled in if it is declared later in the script).
- D. WEIGHT, HUE etc. can also be declared either here or in the script.
- Hit "Save Changes" and then "Save Tiledata".
CHOOSING THE BEST IN-GAME ANIMATION FOR YOUR WEARABLE:
1. Navigate to the ANIMATIONS tab.
2. Scroll down to Equipment > Animations #400-997 and find the animation that looks closest to your new wearable.
3. Take note of the number in parentheses of your animation choice (in our example, we chose fancy shirt (435)).
1. Navigate to the ANIMATIONS tab.
2. Scroll down to Equipment > Animations #400-997 and find the animation that looks closest to your new wearable.
3. Take note of the number in parentheses of your animation choice (in our example, we chose fancy shirt (435)).
ASSOCIATING YOUR GRAPHICS WITH THE PROPER ANIMATIONS (PART 2):A. ASSIGNING YOUR GRAPHICS TO AN ALREADY-EXISTING ANIMATION:
- Navigate to your CLIENT folder and open "Body.def" in a text editor.
- Add an entry for your graphic using the following format:
<GRAPHIC # - 50000> {<NEW ANIM ID#>} <NEW HUE #>
Note that 0 = not hued
So, in our example case...
400 {435} 0
SAVE - OVERWRITE YOUR OLD FILES:
1. Navigate to your UOFiddler folder (usually C:\Users\user\AppData\Roaming\UoFiddler).
2. Copy your updated files: art.mul, artidx.mul, Gumpart.mul, Gumpidx.mul, tiledata.mul
3. Paste/overwrite to your CLIENT directory.
MAKE THE WEARABLE SCRIPT SO YOU CAN ADD IT IN-GAME:
1. Open a text editor and write a basic wearable script (see attachment).
2. Change the name of the item, type of the item (layer) and the Item ID (e.g. "ItemID = 50400;")
3. Save your Script to your server/emulator folder.
4. Restart your server/emulator and login.
5. [add WearableName (example: "[add LongFancyShirt")
---------------------------------------------
B. ASSIGNING YOUR GRAPHICS TO A NEW ANIMATION
Additional Information:
HOW TO EXPORT A .VD FILE OF A CURRENT ANIMATION THAT YOU CAN EDIT THEN USE WITH YOUR NEW ARTWORK:
1. In UOFiddler, navigate to ANIMATIONS > EQUIPMENT and find the animation that is closest to what your clothing looks like and take note of the number in parenthesis after the name (e.g.
elven robe e02 (899)")
2. At the bottom of the Animations screen, Go to SETTINGS > ANIMATION EDIT
3. At the top left of the Animation Edit screen, choose "Choose Anim File" > anim
4. Scroll down to the animation that you want to duplicate, right click on the name, and choose "Export > "To .vd"
5. This will export your animation to the default UOFiddler folder (usually C:\Users\dedicated\AppData\Roaming\UoFiddler)
FAQ:
What if there's no animation to export as a .vd for my choice?
If you cannot export a .vd file then the words for the file will be in red ("P:517(517)").
It probably means they are using another animation that has been rehued in that slot, find the original animation that this one is based on and use it.
If you can't find it, choose another animation that does allow you to export the .vd file.
For instance, I wanted to use "elven robe e02 (899)", but found that it was actually just a rehued "Kamishimo (517)", so I used it instead.
However, the animation info for the Kamisho (517) was actually located in "anim4", not "anim".
Navigating to "anim4", we see that Kamisho (517) is actually using the animation for
Note: While I haven't tried this yet, it appears that in order to install new animations, you will have to use the open animation slots from 400-499 only.
Do I have to export the .vd and re-import it or can I use the same animation for multiple items?
You can re-use the same animations for multiple articles of clothing by altering the Body.def file.
--------------------------------------------
Useful links:
http://www.runuo.com/community/threads/custom-artwork-how-to.54706/
http://www.runuo.com/community/thre...r-animal-vd-animations-to-empty-spots.468206/
http://forums.polserver.com/viewtopic.php?f=32&t=3025
**an extra special thank you to M309, Hammerhand, and Milva for their hands in helping me figure this all out.**


